1、seafile配置

services:
  db:
    image: mariadb:10.11
    container_name: seafile-mysql
    environment:
      - MYSQL_ROOT_PASSWORD=密码  # Requested, set the root's password of MySQL service.
      - MYSQL_LOG_CONSOLE=true
      - MARIADB_AUTO_UPGRADE=1
    volumes:
      - /home/webs/diskadded/seafile_db/seafilemariadb/seafile-mysql/db:/var/lib/mysql  # Requested, specifies the path to MySQL data persistent store.
    networks:
      - seafile-net

  memcached:
    image: memcached:1.6.18
    container_name: seafile-memcached
    entrypoint: memcached -m 256
    networks:
      - seafile-net

  seafile:
    image: seafileltd/seafile-mc:11.0-latest
    container_name: seafile
    ports:
      - "8861:80"
      - "8843:443"  # If https is enabled, cancel the comment.
    volumes:
      - /home/webs/diskadded/seafile_docker/seafiledata/seafile-data:/shared   # Requested, specifies the path to Seafile data persistent store.
    environment:
      - DB_HOST=db
      - DB_ROOT_PASSWD=密码  # Requested, the value shuold be root's password of MySQL service.
      - TIME_ZONE=Asia/Shanghai # Optional, default is UTC. Should be uncomment and set to your local time zone.
      - SEAFILE_ADMIN_EMAIL=邮箱@qq.com # Specifies Seafile admin user, default is 'me@example.com'.
      - SEAFILE_ADMIN_PASSWORD=密码     # Specifies Seafile admin password, default is 'asecret'.
      - SEAFILE_SERVER_LETSENCRYPT=false   # Whether use letsencrypt to generate cert.
      - SEAFILE_SERVER_HOSTNAME=seafile.example.com # Specifies your host name.
    depends_on:
      - db
      - memcached
    networks:
      - seafile-net

networks:
  seafile-net:
其中/home/webs/diskadded/seafile_db是数据库db的位置;/home/webs/diskadded/seafile_docker/是seafile的文件位置,- “8861:80″是80端口的,- “8843:443″是443端口的可以不用,
随后在docker中,或者/diskadded/seafile_docker/seafiledata/seafile-data/seafile/conf中修改seahub_settings.py中修改seafile.example.com为指定的“域名:端口”,对于seafile11后的版本,还需要在seahub_settings.py最后添加CSRF_TRUSTED_ORIGINS = [“https://域名:端口”],在seafile的web配置页面修改seafile.example.com为指定的“域名:端口”。
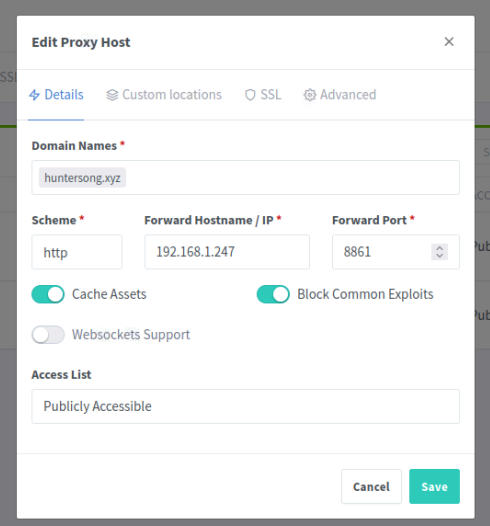
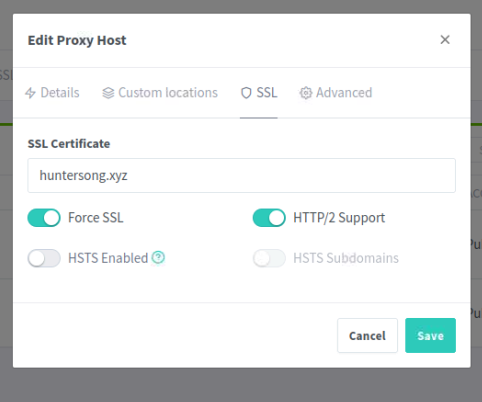
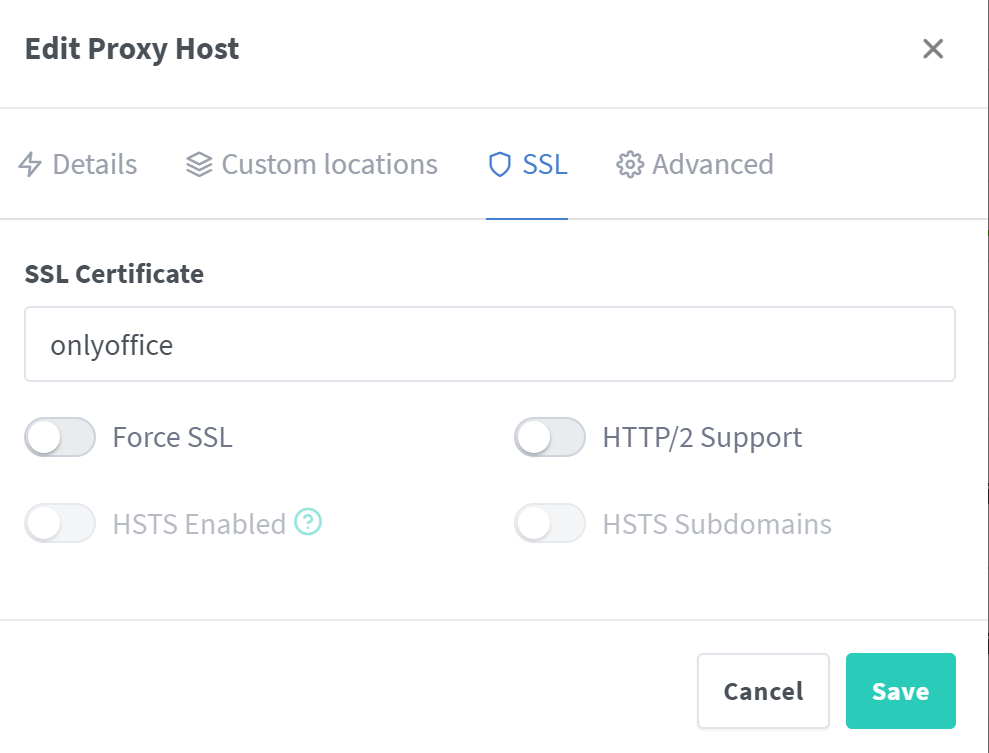
在nginx proxy manager 的web页面进行反向代理配置,分别是添加ssl证书,和代理配置。
我们的nginx proxy manager 服务器的配置如下,npm服务器可以设置在内网的其他服务器192.168.1.246上(注意我们的seafile部署在192.168.1.247上的),最好端口不要相互重复,免得记混了:

这里我们把npm docker中的的80端口映射到8444,443端口映射到8443,这里8444和8443可以认为是docker中npm服务器在路由器上的内网端口,因为我们要用的是https即8443:443端口;
所以我们需要在路由器上对npm的服务器在路由器上的内网端口8443端口再做映射和防火墙打开通道,比如如图所示,我们将其映射到8082上去。

总结,我们用的npm服务代理https://192.168.1.246:8443->https://202.120.xxx.xxx:8082去代理seafile服务器http://192.168.1.247:8861服务,实现ssl访问seafile服务器。
2、onlyoffice的配置
docker run -i -t -d -p 8880:80 --name onlyoffice --restart=always -v /home/webs/diskadded/seafile_onlyoffice/log:/var/log/onlyoffice -v /home/webs/diskadded/seafile_onlyoffice/data:/var/www/onlyoffice/Data -v /home/webs/diskadded/seafile_onlyoffice/lib:/var/lib/onlyoffice -v /home/webs/diskadded/seafile_onlyoffice/db:/var/lib/postgresql -e JWT_ENABLED=false onlyoffice/documentserver从版本72开始,我们添加了随机生成的 NT密铜、如果未使用环境变量指定 JMT机密,则会导致在每次VM或物理服务器重新启动期间重新生成该机密,因此,集成中可能会出现问题,要避免此问题,请指定-e JWT SECRET=my_jwt_secret
如果不打算在安装中使用JT,请使用:-e JWT ENABLED=false
参考在seafile里打开文档调用onlyoffice提示“文档安全令牌未正确形成”,怎解决? – 服务器问题 – Seafile 用户论坛
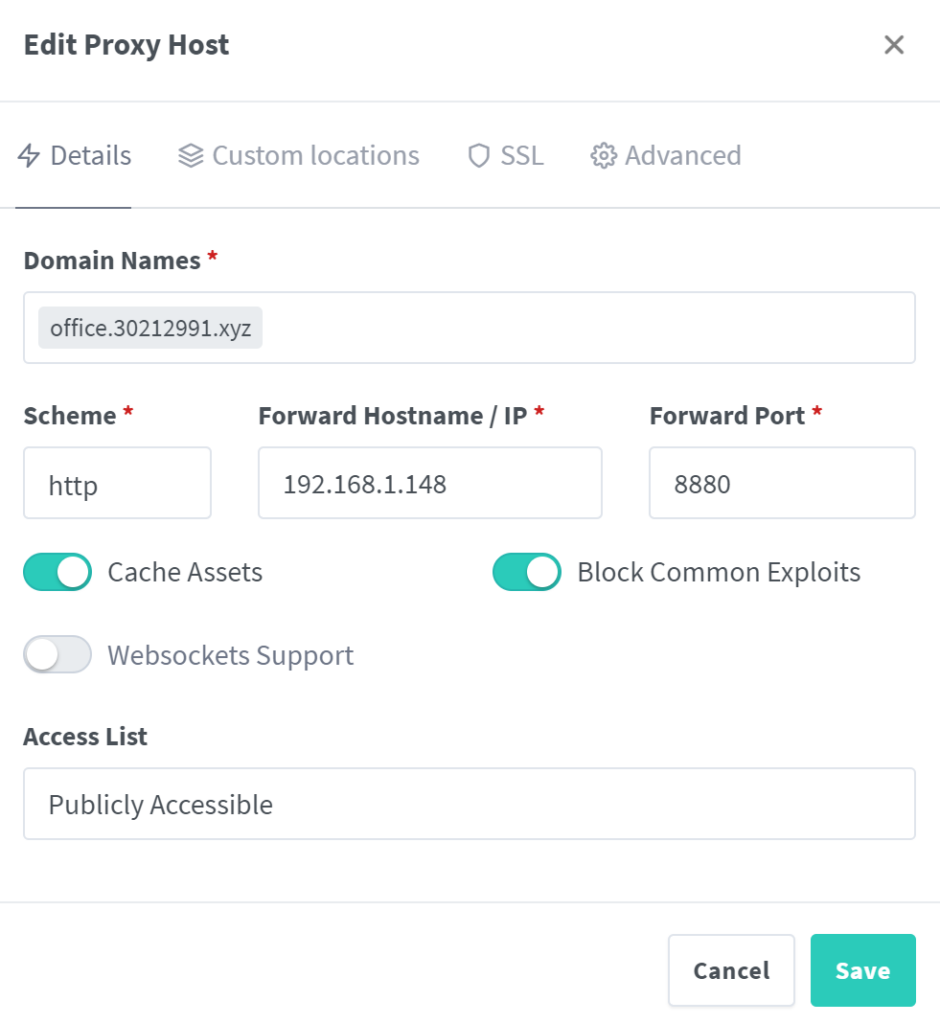
2、使用nginx proxy manager 来配置同一个网段下的onlyoffice的服务,需要在

代码如下
location / {
proxy_pass http://192.168.1.148:8880/;
proxy_set_header Host $http_host;
proxy_redirect http:// https://;
proxy_set_header X-Forwarded-Host $http_host;
proxy_set_header X-Forwarded-Port $server_port;
proxy_set_header X-Forwarded-Proto $scheme;
proxy_set_header X-Forwarded-Scheme $scheme;
proxy_set_header X-Real-IP $remote_addr;
proxy_set_header X-Forwarded-For $remote_addr;
proxy_set_header Upgrade $http_upgrade;
proxy_set_header Connection $http_connection;
proxy_http_version 1.1;
}
一些问题的解决方案
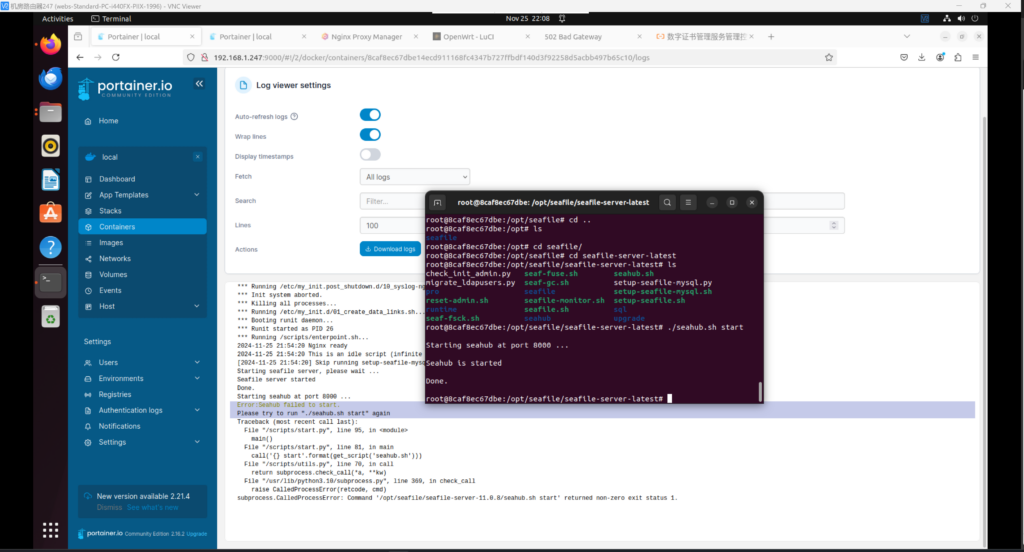
对于重启后报错502 Bad Gateway的问题,一方面通过查看容器中seafile或者其数据库的log日志,看到提示说seahub未能启动,切换到容器内启动./seahub.sh start 即可。