安装PVE系统
PVE更换源:主要是用于关闭enterprise的商业源,使用个人用户版本。
wget https://mirrors.ustc.edu.cn/proxmox/debian/proxmox-release-bullseye.gpg -O /etc/apt/trusted.gpg.d/proxmox-release-bullseye.gpg echo “#deb https://enterprise.proxmox.com/debian/pve bullseye pve-enterprise” > /etc/apt/sources.list.d/pve-enterprise.list echo “deb https://mirrors.ustc.edu.cn/proxmox/debian/pve bullseye pve-no-subscription” > /etc/apt/sources.list.d/pve-no-subscription.list
Debian换源,方便下载软件:
mv /etc/apt/sources.list /etc/apt/sources.list.bk
nano /etc/apt/sources.list
加入在交大的源:
deb https://mirror.sjtu.edu.cn/debian bullseye main contrib non-free
deb https://mirror.sjtu.edu.cn/debian bullseye-updates main contrib non-free
deb https://mirror.sjtu.edu.cn/debian-security bullseye-security main contrib non-free
执行
apt update 和 apt upgrade -y
随后是安装Openwrt:
安装ethtool
apt install ethtool -y识别网卡网口设备
lspci | grep -i 'eth'通过ethtool识别网口对应设备位置以及系统设备名
ethtool -i [设备名称]  #查看设备名对应设备位置
ethtool [设备名称]  #通过查看是否连接确认设备名对应实际网口,如果硬件支持可以使用ethtool --identify [设备名] 命令确认)
这里
如果需要直通网卡看这里加粗说明:
开启硬件直通
BIOS中打开硬件直通相关选项(VT-d & VMX)
编辑Grub
nano /etc/default/grub
注释原条目,并增加开启参数
GRUB_CMDLINE_LINUX_DEFAULT="quiet intel_iommu=on"
如果你的pcie设备分组有问题也可以换成这一行对分组拆分(直通遇到问题都可以尝试这个)
GRUB_CMDLINE_LINUX_DEFAULT="quiet intel_iommu=on pcie_acs_override=downstream"
更新grub
update-grub
重新回到安装openwrt:
如果不需要直通网卡,采用虚拟网卡则继续操作:
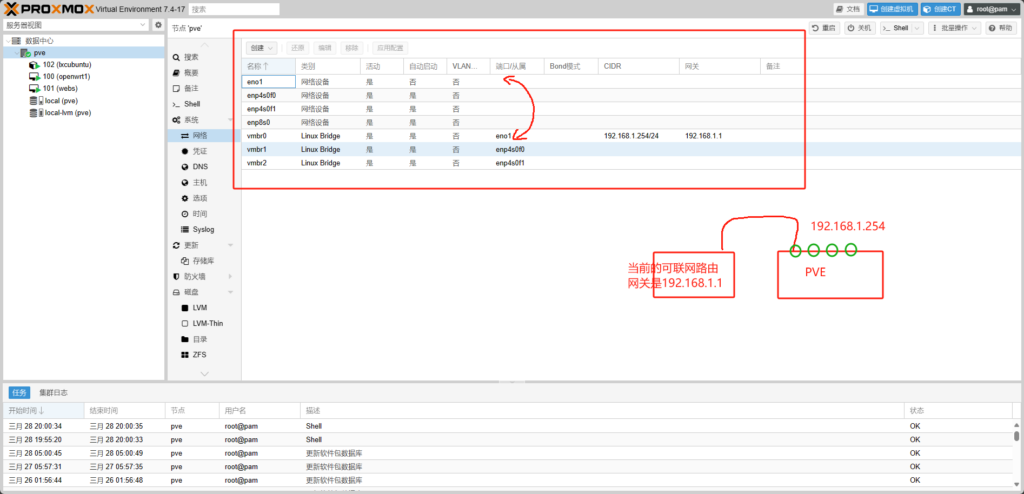
这里需要注意的是,我们首先是有个可用的普通路由,这里分配给PVE的ip是安装PVE时确定的一般给192.168.1.254/24(这里在装系统时需要写上/24),这个网口会已经默认成为虚拟网口,它在PVE中的名称为eno1(不同机器叫法不同,和网口网卡有关),对应的虚拟网口名称叫vmbr0。
我们打开所有的网口,PVE默认没有打开,设置自动启动
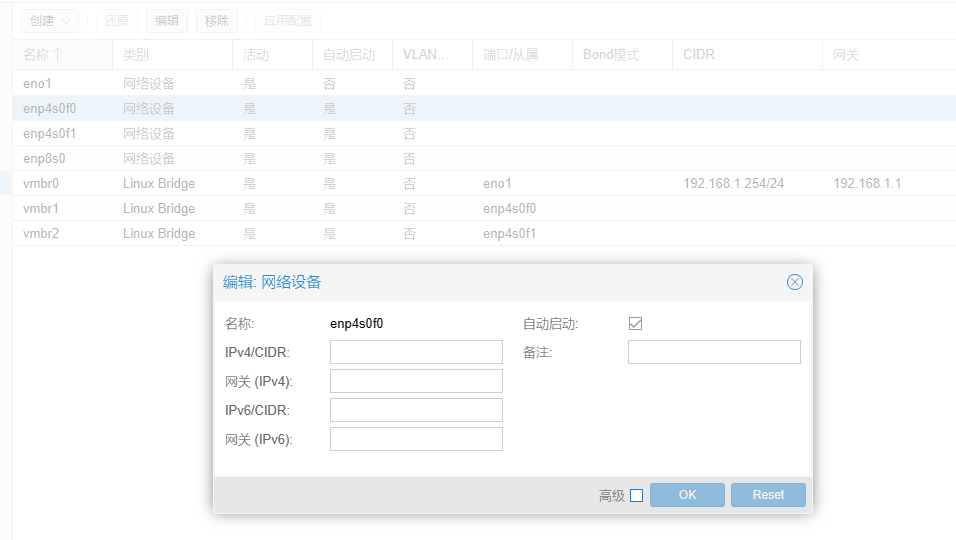
创建Linux Bridge。
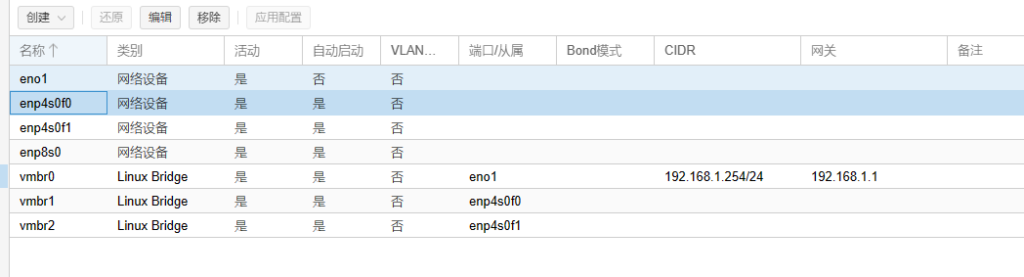
这里记得配置完成网口后,点

然后重启PVE,查看这个页面,是否所有的网口都处于“活动”状态。
上传openwrt镜像,将镜像img扩展名修改为iso,直接通过PVE后台上传

创建虚拟机,挂载该镜像直接启动即可。
启动openwrt的界面

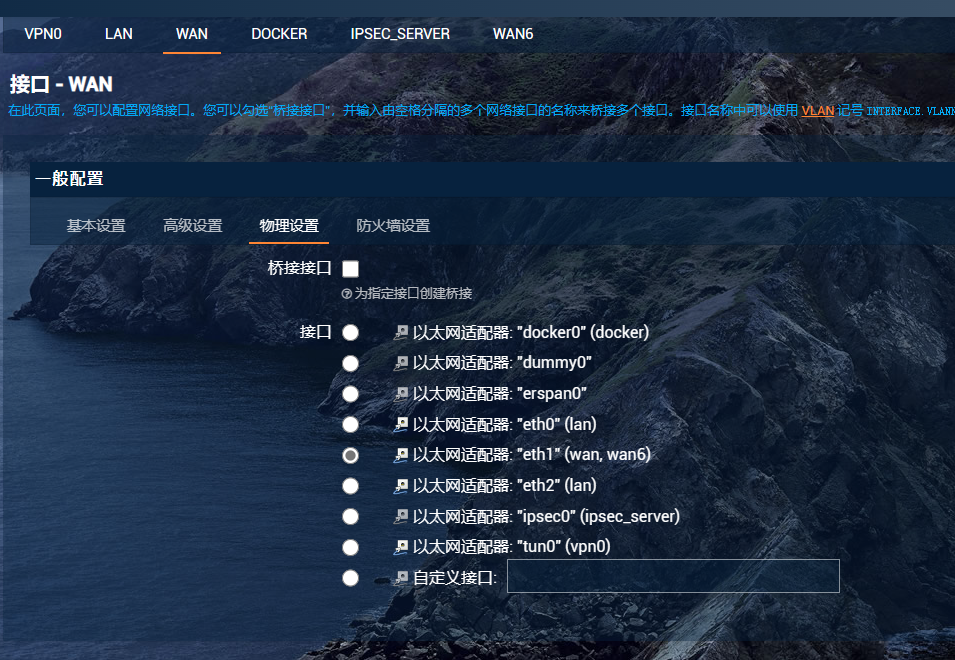
重新配置wan和wan6,这里未知原因,这个固件的wan口不能设置成桥接,桥接会导致无法获取ipv6,这里把wan和wan6的桥接都关闭掉,然后重启openwrt。对lan的这个物理设置则设置为桥接。